Why You Should Resize Your Photos Before You Post
There’s nothing worse than going to a website only to sit and wait for all the photos to load (ok, there are plenty of worse things…but hear me out).
With today’s web surfers getting more and more impatient, a slow loading site can mean that your audience is bouncing before they even get to your information. Not to mention that you will get better SEO results for images that load fast because it provides a better user experience (Google loves a fast loading website).
All the more reason you should be resizing and optimizing your photos for web before posting them to your blog or website. Don’t worry, it’s not as scary as it sounds and I have a few tips to help get you started.
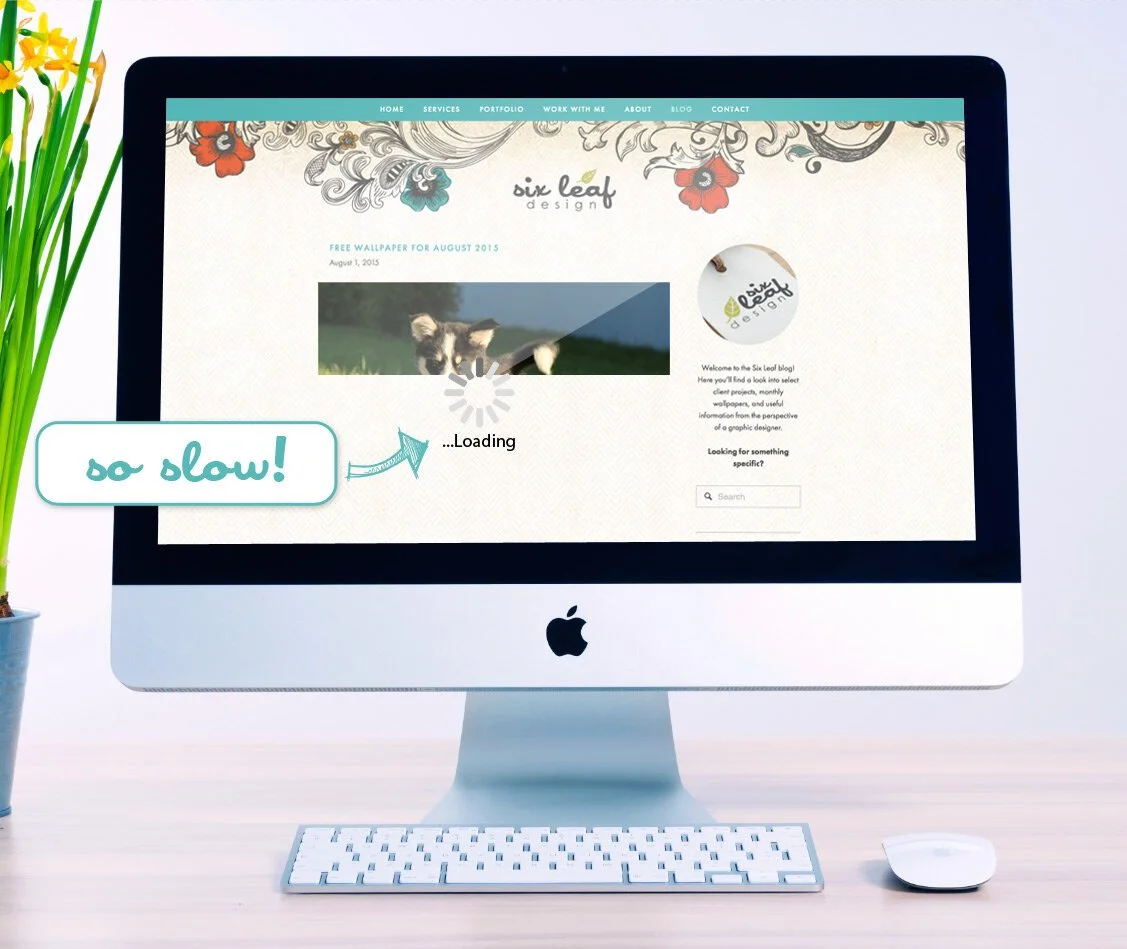
Figure Out the Dimensions
Loading a very large image has no benefit to the quality of the photo on your website, it only takes up more bandwidth and makes the loading time longer. The first thing you will want to do is figure out what size your image should be. You want to make your picture the correct size for the area that you are going to place it.
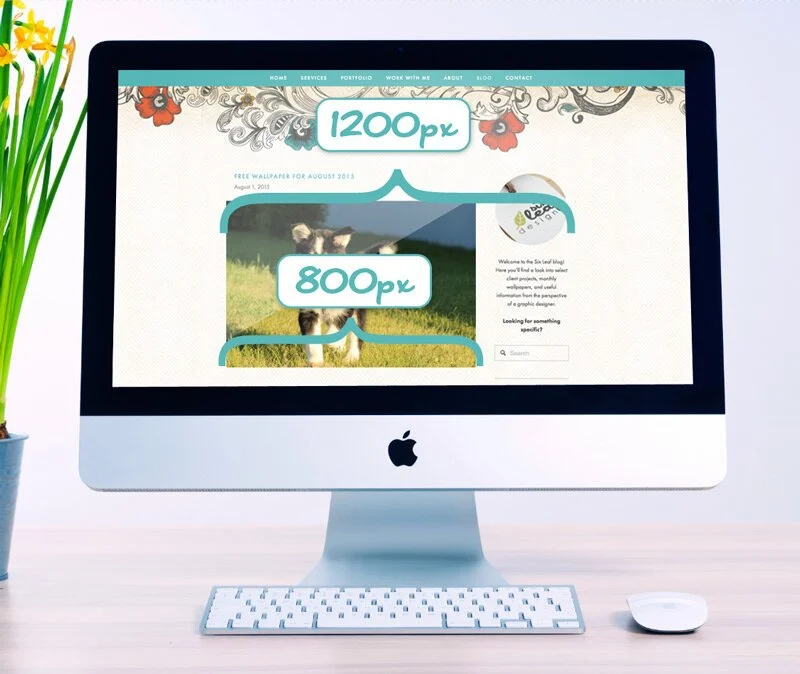
The unit of measurement used when talking about computer or web graphics is pixels (px). Generally websites aren’t wider than 1200px. So, to figure out the dimensions of the area that you want to place your image, first decide how much of the entire width of the website it will take up and then just math accordingly. If you know that you want your photo to take up half the width, your new size will be about 600px wide. If you want it to take up a third of the site, make it 400px wide. Height should be kept relative to keep your picture proportional.
The Photoshop Method
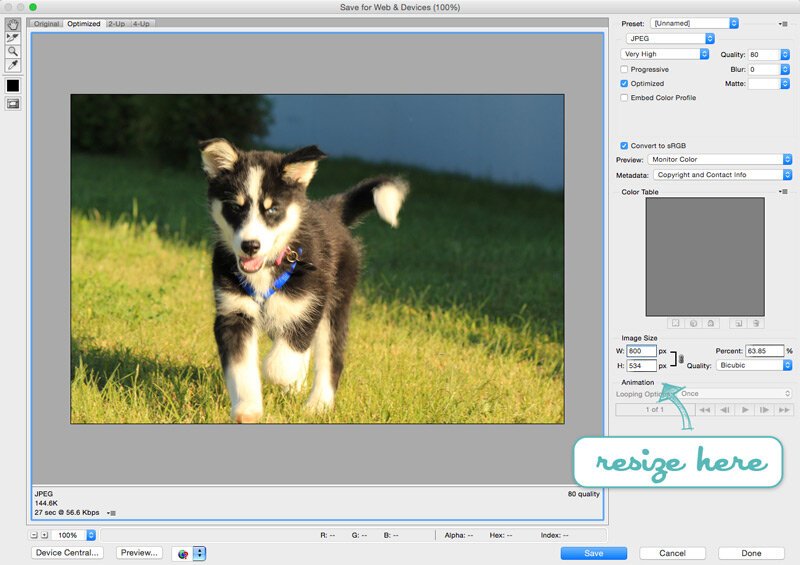
Now that you know what size you need to make your image, there are many different ways to get it resized and ready to post to your website. The first way I’m going to tell you about is the Save For Web feature in Photoshop (my personal favorite).
Open the picture in Photoshop and go to File > Save For Web & Devices. This will open a settings panel where you can choose what type of file you want to save, the quality of the image, and your dimensions (among other things). It’s as easy as that!
The Non-Photoshop Method
Now, I know that many people don’t use Photoshop on a regular basis, so if you don’t have it and still want to resize and optimize your photos, don’t worry! There are many other ways to resize and get your photos ready for web. If you’re on a Mac you can use the Preview app and select Tools > Adjust Size to resize your image. Or if you’re on a Windows computer you can easily use Paint to resize a photo by going to Resize in the home menu and entering the width that you want.
There are also lots of online and free services, like Pic Monkey and Canva that will let you resize photos and even do some limited editing to get them ready for web.
Not only is optimizing your photos good for decreasing your audience’s loading time, it also means less upload time for you when adding pictures to your site! Just taking these few extra steps will make a huge difference and create a better user experience on your website.
Have you been optimizing your photos for web? What methods do you use?